MPI-D1 Zeiss SPIM Demo startup and shutdown
From BioDIP
Contents |
Startup
Hardware
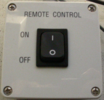
Switch on Remote Control
Software Initiation
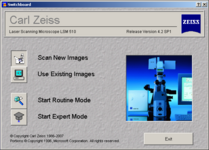
- Start the software
- Make sure "Scan New Images" is clicked
- Then press "Start Expert Mode"
- Next, it will ask you if you should initialise the stage motors. If you didn't do it once already on that day, then click yes.
Make sure there is NO sample in the SPIM when you do the motor initialization, or it will crash into the sample chamber and bread stuff.
Basic Acquisition Setup
This is the main software window. From here you can access all needed control windows (bottom row buttons)
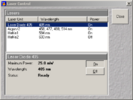
- Laser Control
Switch on the lasers you need.
Remember: for Argon laser, click standby first then on. When its warmed up, use tube current of around 6A - NEVER drag the slider - i causes a crash!!! Click the arrow butons instead. - Microscope Control
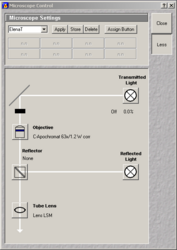
Here you can make changes to the microscope stand itself.
Note: most of these functions you can also directly access via button on the microscope stand. - Conficuration Control
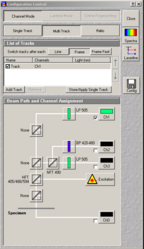
Here you can set up your beam path configuration.
Use "Single Track" for simultaneous, "Multi Track" for sequential imaging
To set up everything properly, you need to know the excitation and emission spectra of each of your dyes. Please use the provided fluorescence database links - Scan Control
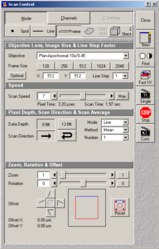
- Mode
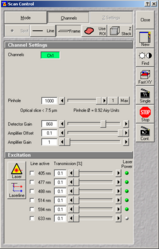
Adjust your settings, ROI, averaging... - Channels
Camera exposure time, binning...
- Mode
- SPIM Macro window from Macros - SPIM. Allows to control the 3D rotation stage and automate imaging.
- Maintain - Objectives. this is where you change the identity of the ovjecteicve that is in the system. Only change position 1. Put the right objective lens here, or else the meta data (eg. pixel size) is all wrong!!!
Observation Modes
Transmitted light and Fluorescence.
Shutdown
Before you do anything, please check the LMF booking database at the END(!) of your imaging session to see whether you are the last user or not!!!
If you are not the last user...
- Close the main software window. In order to do this, either choose "File" > "Exit", or click the "x" in the top right corner. You may be prompted to save open image data.
-
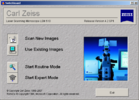

- Back in the "Switchboard", click "Exit". In case lasers are running, a window will pop up asking you what you want to do with these lasers. Since there is another user coming, you leave the lasers on and click ok.
- Upload your data to your file server.
- Log off the windows account via "Start" > "Log off...".
If you are the last user...
- Go to the laser control and switch off all running laser!
- Then close the main software window. In order to do this, either choose "File" > "Exit", or click the "x" in the top right corner. You may be prompted to save open image data.

- Back in the "Switchboard", click "Exit". A window will pop up warning you that the lasers still need time to cool down. Click ok.
- Upload your data to your file server.
- Shut down windows via "Start" > "Shut down...".
Wait 10 minutes before you proceed! This time is needed to cool down the lasers after you switched them off in the software!! Then..
Switch off the Remote Control.
