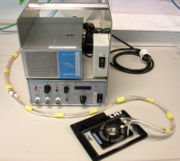
Warner Instruments TB-3 CCD Thermal Insert
From BioDIP
Overview
The TB-3 is available in two versions:
One main advantage of the Warner heating and cooling incubation system is the cooling of small volumes of medium directly on the microscope. Due to the design (water-cooled Peltier element) it is quite light-weight and works on fragile Z-stages as well. The official working range is 5 - 50 ° celsius. However, real 5 °C could never be reached on our side. In best case we got it down to 6,5 °C.
This manual gives some hints about its usage.
Requirements
- Warner Instruments TB-3 CCD Thermal Insert
- Prior NZ200CE NanoScan Z-stage - or different/custom-made insert for other stages
- OKO-LAB glass-bottom metal dish, model RA-35-18-2000-06 (recommended for best performance)
- customized metal spacer for the dish of interest (the delivered ones are usually either too small or too big)
Manual
- Initial steps
- The system arrives with quite a lot of cables, hoses and accessories. Go through the manual and set up everything you need. Here is a list of the parts you probably need:
- temperature controller
- water-cooling pump, filled with distilled water and anti-freeze/-rust etc. agent
* An easy way to fill the system with liquid: Connect all the hoses. Open the screw at the top of the pump. Fill the reservoir with liquid, using a wash bottle/flask. Turn on the pump and wait a bit until the liquid is distributed in the hoses. Fill the reservoir again, while the pump is running, until it is full. - TB-3 CCD chamber, connected to the controller via data cable and to the pump via water hoses
- chamber lid for covering the dish and improve the performance
- power cables for pump and controller
* The pump has no on/off switch. Therefore we coupled it to a central power switch, which also features the controller. This simplifies the usage, since only one power cable and one switch is needed.
- Find a good location for the system next to your microscope of interest. Make sure that hoses and cables are long enough, especially when the chamber is installed and driving around on your stage.
- Check if you have a proper holder which fits to your stage. A flexible solution is to have a plastic adapter which adapts the chamber to 96 well plate holders. The latter ones are usually available for all types of microscopes, so you just need one adapter.
- The system arrives with quite a lot of cables, hoses and accessories. Go through the manual and set up everything you need. Here is a list of the parts you probably need:
- Setup before imaging
- Install the controller and the pump next to your microscope and the chamber itself on the microscope stage. Make sure to place the hoses and cables in a way that they don't disturb the movement of i.e. the stage.
- Put all the switches on the front panel of the controller to their recommended position (see picture).
- Switch the incubation system on. Put the "METER SELECT" to "SET TEMP" and set the temperature via the "SET TEMPERATURE" knob. Wait until the system stabilized at the target temperature.
- Insert the pre-heated/-cooled dish with your sample.
* Depending on your sample - if you already have it incubated at the target temperature or not - you can also put it in right from the beginning. Placing the dish in the chamber is kind of tricky; for beginners it is easier to do it while the chamber is not on the stage yet, in order to avoid liquid on/in the microscope.
- Handling while imaging

