MPI-CO1 - Olympus FV1000 - startup & shutdown
From BioDIP
(Difference between revisions)
m |
m |
||
| Line 2: | Line 2: | ||
=== hardware === | === hardware === | ||
| + | [[image:mpi09_561.jpg|200x100px]] | ||
| + | [[image:mpi09_argon-633.jpg|200x100px]] | ||
| + | [[image:mpi09_powermanager.jpg|200x100px]] | ||
| + | [[image:mpi09_stagecontroller.jpg|200x100px]] | ||
# Switch on lasers you need: | # Switch on lasers you need: | ||
#* 633nm laser: turn key | #* 633nm laser: turn key | ||
| Line 11: | Line 15: | ||
#* 405nm cutter ... bleaching/ ablation laser | #* 405nm cutter ... bleaching/ ablation laser | ||
=== software === | === software === | ||
| + | [[image:mpi09_sw-icon.jpg|200x100px]] [[image:mpi09_sw-login.jpg|200x100px]] [[image:mpi09_sw-dyelist.jpg|200x100px]] [[image:mpi09_sw-acquisition.jpg|200x100px]] [[image:mpi09_sw-explorer.jpg|200x100px]] | ||
# Start software and log in as lmf user. | # Start software and log in as lmf user. | ||
# If applicable, use the Olympus Dye list to help you set up the beam path settings. | # If applicable, use the Olympus Dye list to help you set up the beam path settings. | ||
| Line 17: | Line 22: | ||
=== basic troubleshooting === | === basic troubleshooting === | ||
* PROBLEM: No light at the object plane! | * PROBLEM: No light at the object plane! | ||
| + | [[image:mpi09_trouble-shutter.jpg|200x100px]] | ||
** CHECK: excitation shutter of turret open?? | ** CHECK: excitation shutter of turret open?? | ||
* PROBLEM: No 405nm imaging laser at the object plane! | * PROBLEM: No 405nm imaging laser at the object plane! | ||
| − | |||
| − | |||
| − | |||
| − | |||
| − | |||
| − | |||
| − | |||
| − | |||
| − | |||
| − | |||
| − | |||
[[image:mpi09_trouble-sim.jpg|200x100px]] | [[image:mpi09_trouble-sim.jpg|200x100px]] | ||
| − | + | ** CHECK: SIM function disabled?? | |
| − | + | ||
| − | + | ||
| − | + | ||
| − | + | ||
| − | + | ||
| − | + | ||
[[category:hardware]] | [[category:hardware]] | ||
[[category:MPI09_manuals]] | [[category:MPI09_manuals]] | ||
Revision as of 15:26, 6 February 2009
Contents |
How to initiate the Olympus FV1000
hardware
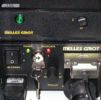
- Switch on lasers you need:
- 633nm laser: turn key
- Argon laser: switch button, then turn the key
- 561nm laser: press the green button
- Switch on the motorised stage
- Switch on the rest of the system using the power manager below the monitors. Think about what components you really need (otherwise leave them switched off):
- LD405 ... 405nm imaging laser
- 405nm cutter ... bleaching/ ablation laser
software
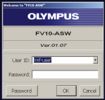
- Start software and log in as lmf user.
- If applicable, use the Olympus Dye list to help you set up the beam path settings.
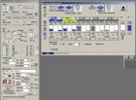
- Set up the aquisition parameters according to your sample and needs. Once you have an image, use the HV and offset function to adjust for saturation and background.
- You might want to reuse parameters from an old image using the Explorer. Look for your image data, right mouse click on it and choose “Reload aquisition parameters”
basic troubleshooting
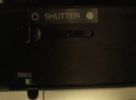
- PROBLEM: No light at the object plane!
- CHECK: excitation shutter of turret open??
- PROBLEM: No 405nm imaging laser at the object plane!
- CHECK: SIM function disabled??


