Zeiss LSM 510 Tile Scan
From BioDIP
Overview
This manual demonstrates how to acquire Tile/Mosaic Scans with smooth transitions using a LSM510 confocal microscope. It facilitates the "Multi Time" macro.
Requirements
- Zeiss LSM510
- Scan Stage MCU28
- LSM Software v4.2
- Multi Time Macro 4.2 v1.2
Manual
- Set up your imaging conditions. Define scan configuration and scan settings, adjust focal plane, signal intensity and image quality.
- Save your configuration in the according window, either single track or multi track.
- Make sure that you have a target database for the tile scan. If not, create a new database file via the main file menu.
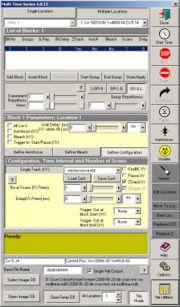
- Open the multi time macro and select the multiple locations tab at the top.
- Select the first block (default setting) and click "define configuration". Choose single or multi track, select the saved configuration and load it via the "load config" button. Choose if you want to use the Z-stack feature by selecting the "Z-Stack" box. Stacks have to be set up as usual via the LSM software scan control.
- Define the tile scan area.
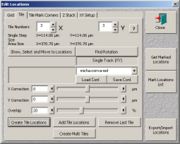
- (1. possibility) If you want to mark the center and arrange the tile scan around it (classic approach as in the stage utility), go to "edit locations" and select the "tile" tab. Drive the stage to the center of interest, define the tile numbers, set an overlap of 20% and click "create tile locations".
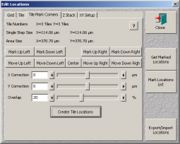
- (2. possibility) If you want to mark corners, go to "edit locations" and select the "tile mark corners" tab. Go to one corner with the scan stage and mark it using the according button. Drive the stage to the diagonally opposite corner and mark it. Set an overlap of 20% and click "create tile locations".
- Set the created database as the image database and set the "base file name". Select the "single file output" box.
- Start the tile scan with "start time". Wait for the acquisition and the automated saving.
- Select the remaining stack window "All_(base file name)_Sum".
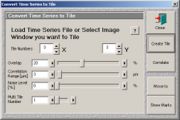
- Go to the multi time windows and click the "tile utilities". Set a correlation range of 3 µm.
- Click "correlate" and wait for the correlation. The processing time depends on the correlation range.
- Save the result. The "Save as" button in the image window disappears from time to time, in this case just save via the LSM software file menu.


